GoHighLevel Free Trial: How to Get 30 Days
10 min read · Updated May 2026
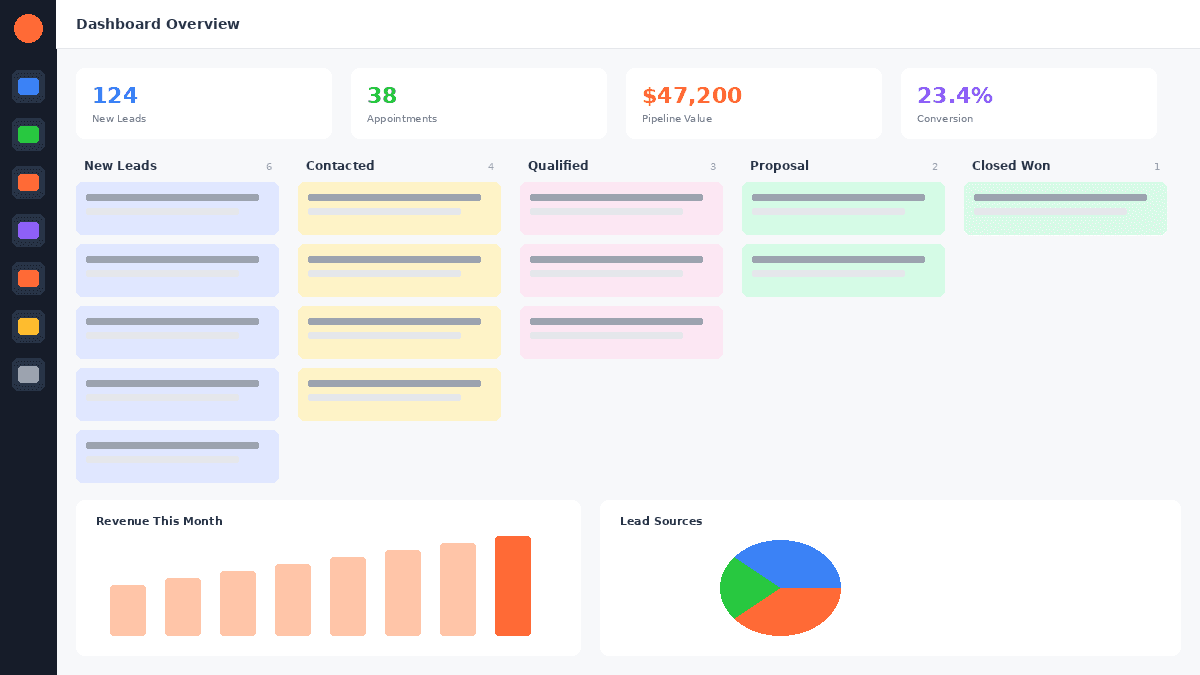
How do you use GoHighLevel?
The fastest way to learn GoHighLevel is to build with it, not browse it. Start a free trial, then set up the core in order: get oriented on the dashboard, add a contact and a pipeline, build one automation, build a funnel, connect a calendar, and switch on reputation management. Done in this sequence, you have a working lead-capture-and-follow-up system inside a day or two.
GoHighLevel does a lot. CRM, funnels, email, SMS, automations, calendars, reputation, reporting, and that breadth is exactly what trips people up. They open the platform, feel slightly overwhelmed, click around for an hour, and learn nothing.
I've used GoHighLevel for years, and the way to actually learn it is the opposite of a tour. You build one real thing, in order, using the parts that matter together. This walkthrough takes you through that: the exact setup I'd do first. So by the end you have a functioning system and a genuine verdict on whether GoHighLevel fits your business.
It's written to be followed inside a free trial, which is the no-cost way to get hands-on.
Before you start: get into a trial
You need an account to follow along. If you haven't started one, my GoHighLevel free trial guide covers how to sign up, and how to get a 30-day trial instead of the standard 14, which makes a real difference when you're learning. One honest note so nothing surprises you: the trial does ask for a card at signup, nothing is charged during the 30 days, and you can cancel any time before it ends. The trial guide has the full detail.
Once you're in and looking at the GoHighLevel dashboard, start here.
Step 1: Get your bearings (your first 10 minutes)
The interface can feel busy on first load. Ignore most of it. There are five sections you actually need to know first:
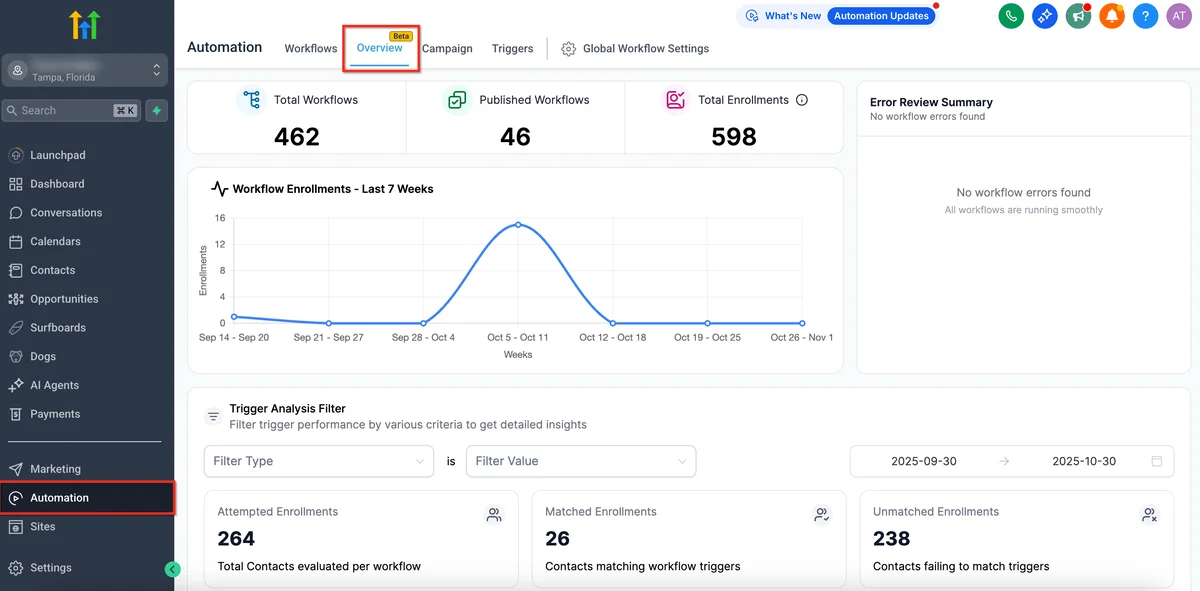
- Contacts: your CRM. Every lead, client and prospect lives here. This is where you'll spend most of week one.
- Opportunities: your pipeline. Drag-and-drop boards showing where each contact sits in your sales process.
- Conversations: a unified inbox pulling SMS, email, Facebook Messenger, Instagram DMs and Google Business messages into one thread list.
- Automations (Workflows): the engine. Trigger-based sequences that send messages, move contacts, assign tasks and more.
- Sites: the funnel builder, website builder, landing pages and forms. Where you build the things that capture leads.
In the left sidebar you'll also see Calendars, Email Marketing, Reputation and Reporting. Those come into later steps.
Spend ten minutes clicking through those five sections. Don't build anything yet. Just get the lay of the land.
Step 2: Set up your CRM: a contact and a pipeline
Go to Contacts and click "Add Contact." Add a real lead or a test contact. Name, email, phone, and tag them something simple like "Trial Test."
Now go to Opportunities and click "Add Pipeline." Name it after how your business actually sells, with four or five stages. For example: Lead, Qualified, Proposal Sent, Closed Won. Drag your test contact into the first stage.
That's a working CRM with a visual pipeline, and it took about five minutes. Most businesses end up running three to five pipelines. New leads, active clients, renewals, but build one for now. Add others once the system makes sense.
FREE TRIAL
Get 30 Days Free With Our Partner Link
- ✓Full access for 30 days
- ✓No charge during the trial
- ✓Cancel any time
Join 2.2 million businesses already running on GoHighLevel
Step 3: Build your first automation
This is the part that makes GoHighLevel worth its price, so don't skip it. Go to Automations, click "Create Workflow," then "Start from Scratch."

Build this exact sequence. It's simple, practical, and shows you how the workflow engine thinks:
- Trigger: Contact Created. Fires whenever a new contact lands in your CRM.
- Action 1. Send SMS, no delay: a short message such as "Hi [First name], thanks for reaching out. I'll follow up shortly. Reply STOP to opt out." Use the merge-field button in the SMS editor to drop in the contact's real first name.
- Action 2. Wait 5 minutes, then send Email: subject "Thanks for connecting," with a brief intro and a link to your calendar or a useful resource.
- Action 3. Wait 1 day, then create a task for a manual follow-up call.
Publish it, then test it by adding a second contact manually. Within five minutes that contact should get the SMS and be queued for the email.
That's the core loop: a lead enters, and gets a response within minutes, automatically, with you doing nothing. It's the single biggest reason businesses run on GoHighLevel, and you've just built it.
Step 4: Build a funnel and connect it
Go to Sites → Funnels and click "New Funnel." Name it something like "Lead Capture Test."
Add a step, then "Add Page". GoHighLevel opens a template library sorted by use case (lead magnets, webinars, service businesses, coaching). Pick one close to yours. The builder is drag-and-drop: click any element to edit text, swap images or change colours. Customise the headline, subheadline and form fields to match your real offer, then add a thank-you page step and hit "Publish" on both.
You now have a live funnel with a real URL. Here's the important bit. Connect it to the automation from Step 3: when someone submits the funnel's form, they're added as a contact, which fires your follow-up sequence. Form submission → automatic SMS and email → task. The full lead-capture loop is now live, on real infrastructure that would otherwise cost hundreds a month across separate tools: a funnel builder, an email platform, an SMS service.
Step 5: Set up your calendar
Go to Calendars and click "Create Calendar." GoHighLevel offers three types:

- Simple. One-to-one bookings. Set your availability, appointment length and buffer time.
- Round Robin. Distributes bookings across team members; useful for sales teams.
- Class Booking. Group sessions with an attendee cap.
For your first calendar use Simple. Connect your Google Calendar under Settings → Integrations so GoHighLevel checks for conflicts in real time and never double-books you. Each calendar gets its own booking page URL. Embed it in your funnel, put it on your site, or send the link directly. It's Calendly-style booking, but native, with confirmation emails and SMS reminders built in.
Then add a calendar step to your follow-up automation: after the first SMS and email, wait a day and send the booking link. That sequence alone covers most of what an appointment-setter would do.
Step 6: Turn on reputation management
Go to Reputation and connect your Google Business Profile via the "Connect Google" flow. Once it's linked, GoHighLevel can send automated review requests after a trigger: a job marked complete, an appointment closed.
Set up a simple one:
- Trigger: Appointment Status changed to "Showed"
- Action. Wait 2 hours, then send SMS: "Hi [First name], thanks for meeting today. If you have a moment, a quick Google review would mean a lot to us."
GoHighLevel automatically appends your Google review link. It's the kind of feature standalone reputation tools charge $100 or more a month for.
Your 30-day plan
You don't need to do everything at once. A sensible pace across the trial:
- Days 1–7. Work through Steps 1 to 6 above. Get your CRM, pipeline, first automation, funnel, calendar and reputation requests live. Add 10–20 real contacts and let the automations run on actual data.
- Days 8–14. Explore Email Marketing → Campaigns. Build a simple three-email nurture sequence for leads who didn't book. Send a little real traffic to your funnel.
- Days 15–22. If you're an agency or heading that way, create your first sub-account under Agency Settings and look at the white-label options. (Sub-accounts need the Unlimited plan or above.)
- Days 23–30. Open Reporting. Look at conversation rates, workflow completion and funnel conversion, and decide which plan fits. The pricing breakdown helps here.
By the end you won't be guessing. You'll have a working system and real data to judge it on.
A note on billing
Worth being straight about this so nothing catches you out. When you sign up, a card goes on file. Nothing is charged during the 30 days, but the trial converts automatically afterwards, billing that card for the plan you chose, unless you cancel before the trial ends. If you're only evaluating, put a reminder in your calendar a couple of days before day 30 and cancel in your account billing settings. The full mechanics are in the GoHighLevel free trial guide.
Frequently Asked Questions
Related Resources
- Visit the GoHighLevel official pricing
- Visit the GoHighLevel on G2
Frequently Asked Questions
Can I follow this walkthrough for free?
Do I need technical skills to set up GoHighLevel?
How long does the setup in this walkthrough take?
What should I build first on GoHighLevel?
Do I have to build everything at once?
Can I manage clients in GoHighLevel during the trial?
Does the work I build in this walkthrough carry over if I subscribe?
That's the working core of GoHighLevel. Build it during your trial and you'll have a real answer, not a hunch. About whether it belongs in your business. If you haven't started a trial yet, the free trial guide gets you the 30-day version.
EXTENDED FREE TRIAL
Start with 30 days free, not 14.
Use our partner link to get double the standard 14-day trial.
Start Your Free 30-Day Trial →Ashley Kemp is a digital entrepreneur and perpetual traveller. Switched from ClickFunnels to GoHighLevel years ago and never looked back. Writing about what actually works.
Was this article helpful?


